Another long easter holiday is approaching and we’re planning to do a lot of work with help of a few friends. We’ve ordered a lot of insulation, paneling and flooring for this and did so early to make sure we got everything in time.
Wood fiber insulation
Not that we have a ton of experience working with insulation in general but we’ve done it a few times on interior walls but mainly mineral wool. The initial plan was to do hemp crete walls but without water or electricity installed we opted for a wood fiber insulation instead for this house. After doing a some calculations on volume we ended up ordering about 18 pallets of wood fiber insulation from Hunton.
 We knew it was a lot of insulation, but 18 pallets is a lot when you see it arrive on a truck. It was 2 full truck loads.
 The plan was to get the majority of the insulation in place during easter but getting a head start wouldn’t hurt and getting to know how to work with the material early on is always good.
 Slow in the beginning but as you learn to work it, things speed up significantly. Corner is done.
 We built a small jig to aid with cutting the insulation straight, it help but after a while we got good enough without it and cut most things by hand anyway.
 A bit more insulation in place.
Insulation from natural wood fiber
We decided early on that we would choose the natural material option when such option made sense and didn’t break our budget completely. We went with a wood fiber product from Hunton called Nativo and after some reading up on it’s insulating capabilities we went with 220mm thick insulation for the walls and 315mm thick in the ceiling. Should be plenty enough for a workshop but we’ll find out :-)
Brick wall for the wood stove
As part of our plan to do a big push on the build during easter weekend we wanted to get the wood stove installed. But first we needed to build the brick wall for the wood stove to be placed against. With no bricklayer available to help we got our local carpenter with little experience in brick laying to help us out. Number one priority was to make the wall functional, if it wasn’t perfect, that would be fine.
 The support wall will serve both as a guide but also for anchoring the brick wall.
 The first few bricks in place, so far so good.
 Still looking good, at least from this angle.
 Very nice to have a scaffold at hand when you need one.
 Almost done.
In the end we managed to get the whole brick wall up. It’s not perfect by any means but definitely good enough and will serve its purpose well. The brick we got from Wienerberger (swedish website) with a colored mortar from Weber. We’re very happy with the color and it should work well with the interior walls too.
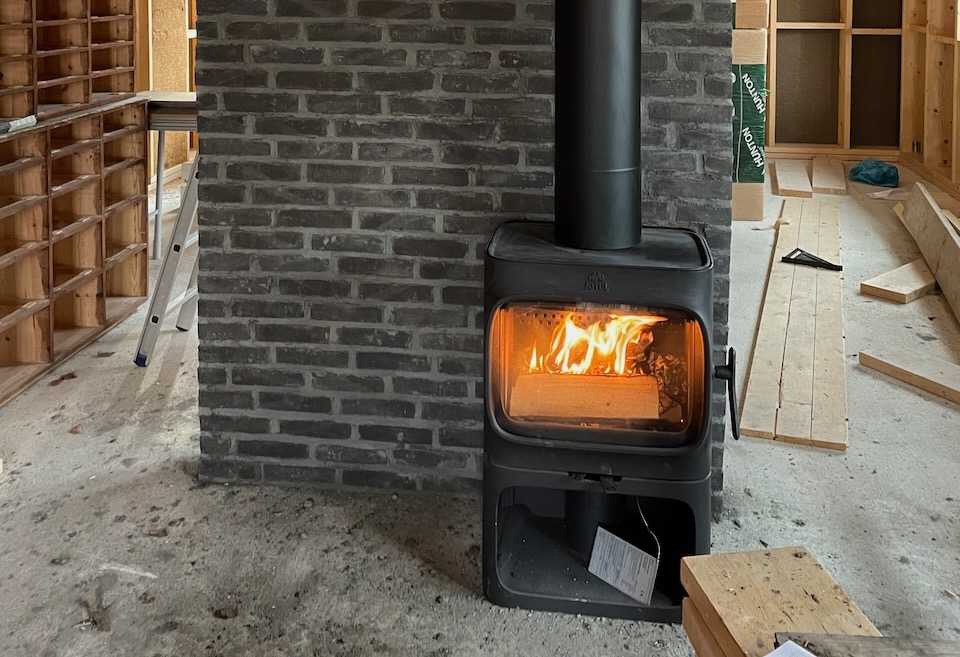
 And the stove in place with the scaffold removed. This should provide some good heat during easter weekend…
 …especially considering the weather we got now.
Burger break
Although the weather is pretty cold this time of year sometimes it’s slightly better and that means burgers.
 First we need a fire.
 Then we grill the burgers.
 And we end up with these delicious hamburgers. Hard to beat burgers grilled outdoors.
Prepared for easter weekend
So, with the wood stove in place and most material already here we should be good to go for a great and productive easter weekend.
 Stove in place and some insulation installed.
 Plenty of insulation left though.
